


Water Softener Installation Guide for Knoxville Homes
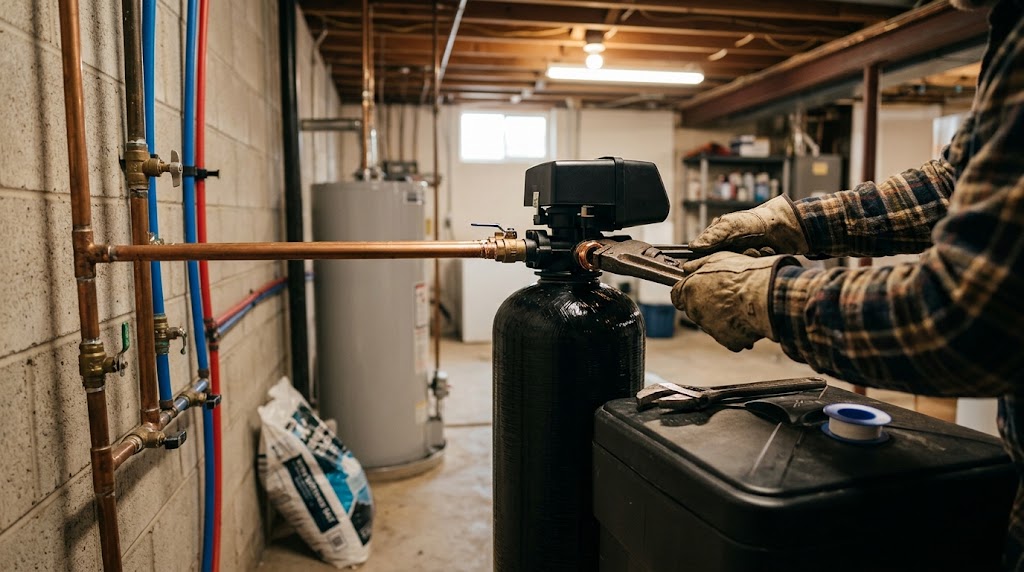
Access to clean, reliable municipal water is something many homeowners take for granted. However, residents across Knoxville, Farragut, Maryville, Oak Ridge, and surrounding East Tennessee communities frequently contend with the unseen effects of hard water. Characterized by high concentrations of dissolved calcium and magnesium minerals, hard water slowly degrades household plumbing systems, damages water-using appliances, stains bathroom fixtures, and leaves skin and hair feeling perpetually dry.
Installing a whole-home water softener is one of the most effective home improvements a Knox County homeowner can make. A properly sized and professionally installed ion-exchange water softener neutralizes mineral hardness at your home's main water entry point. This comprehensive guide walks through the realities of Knoxville's water geology, the mechanics of ion-exchange water softening, pre-installation sizing, step-by-step installation procedures, and ongoing system maintenance.
1. Understanding Water Hardness in Knoxville and East Tennessee
The distinct landscape of East Tennessee is dominated by the Ridge and Valley geological province, featuring extensive limestone and dolomite rock formations beneath the soil. As rainwater percolates down through the earth into underground aquifers, rivers, and reservoir systems—including the Tennessee River, Holston River, and French Broad River—it dissolves significant amounts of calcium carbonate and magnesium carbonate.
Rainwater Infiltrates Ground
       │
       ▼
Percolates Through Limestone & Dolomite Formations
       │
       ▼
Dissolves Calcium & Magnesium Ions into Aquifers
       │
       ▼
Hard Water Delivered to Household Plumbing
Water hardness is measured in Grains Per Gallon (GPG) or Parts Per Million (PPM/mg/L). Water hardness levels across Knox County generally range from 7 to over 15 GPG depending on your specific utility provider, municipal well sources, or private well depths:
- 0 to 1.0 GPG: Soft Water
- 1.0 to 3.5 GPG: Slightly Hard Water
- 3.5 to 7.0 GPG: Moderately Hard Water
- 7.0 to 10.5 GPG: Hard Water
- 10.5 GPG and Above: Very Hard Water
Everyday Consequences of Hard Water in Your Home
Living with hard water creates persistent, costly issues throughout your living space:
- Limescale Crust inside Pipes: Calcium and magnesium precipitate out of standing water, forming a rock-hard mineral crust inside supply lines, valve bodies, and showerheads that restricts water flow over time.
- Premature Water Heater Failure: Hard water minerals coat the heating elements of electric water heaters or settle in thick sludge layers along the bottom of gas water heater tanks. This mineral barrier acts as an insulator, forcing the appliance to run longer, overheat, and fail prematurely.
- Soap Scum and Stained Fixtures: Hard water minerals react with soap molecules to form an insoluble film known as curd or soap scum. This leaves stubborn white crust on glass shower doors, spots on dishes, and dull residue on freshly washed laundry.
- Skin and Hair Irritation: Soap scum left behind on skin strips away natural protective oils, worsening conditions like eczema and leaving hair feeling stiff or brittle.
2. How an Ion-Exchange Water Softener Works
Modern residential water softeners operate on a simple, highly effective chemical principle called ion exchange. The system consists of two primary tanks: a resin tank containing millions of microscopic polystyrene beads and a brine tank filled with water softener salt (sodium chloride or potassium chloride).
The Softening Cycle
The resin beads inside the main tank carry a negative electrical charge and are pre-loaded with positively charged sodium or potassium ions. As raw, hard water flows through the resin bed, the positively charged calcium and magnesium ions in the water are strongly attracted to the resin beads. The resin holds onto the calcium and magnesium while releasing an equivalent amount of harmless sodium ions into the water stream, effectively softening the water before it enters your home's distribution pipes.
Hard Water Enters Resin Tank
       │
       ▼
Calcium & Magnesium Ions Cling to Resin Beads
       │
       ▼
Sodium Ions Released into Water Stream
       │
       ▼
Soft Water Flowing to Home Fixtures
The Regeneration Cycle
Eventually, every resin bead becomes saturated with calcium and magnesium ions and can no longer capture hardness minerals. The system's digital control valve then initiates a multi-stage regeneration cycle, typically scheduled at 2:00 AM when household water demand is lowest:
- Backwash: Clean water flushes upward through the resin bed to lift dirt, sediment, and trapped debris out to a drain line.
- Brine Draw: Concentrated saltwater solution from the brine tank is drawn into the resin tank. The high sodium concentration strips accumulated calcium and magnesium off the resin beads and washes them down the drain.
- Rinse: Fresh water rinses remaining brine out of the resin tank.
- Refill: Clean water fills the brine tank to dissolve salt for the next regeneration cycle.
Taking proactive measures to protect overall plumbing health prevents unexpected equipment failures. Reviewing how to prevent plumbing leaks in your home provides essential guidance on monitoring main shutoff valves, inspecting supply line connections, and maintaining structural pipe integrity.
3. Sizing a Water Softener for Your Knoxville Home
Installing a water softener that is too small leads to frequent regeneration cycles, excessive salt consumption, and premature resin exhaustion. Installing a unit that is far too large wastes money upfront and can cause resin bed channeling. Proper sizing requires calculating your daily grain removal requirements.
Calculating Grain Capacity Requirements
- Determine Household Water Consumption: The average person uses approximately 75 to 80 gallons of water per day. Multiply the number of permanent residents in your home by 80. (Example: A family of 4 consumes approximately 320 gallons of water daily).
- Test Your Water Hardness: Use a professional laboratory test or calibrated test strips to measure your water hardness in Grains Per Gallon. (Example: 10 GPG).
- Calculate Daily Grain Load: Multiply daily water consumption by water hardness. (320 gallons x 10 GPG = 3,200 grains of hardness to remove per day).
- Establish Regeneration Frequency: Ideal water softener sizing allows the system to regenerate once every 6 to 7 days to preserve mechanical valve life and resin quality. Multiply daily grain load by 7 days. (3,200 grains x 7 days = 22,400 grains).
Based on this calculation, a standard 32,000-grain (1.0 cubic foot resin volume) water softener system is the optimal choice for a typical four-person household in Knoxville. Larger homes with high-flow body sprayers or families of five or more should opt for a 48,000-grain or 64,000-grain dual-tank unit.
Addressing drain line restrictions and waste line performance ensures your water softener regeneration cycle drains cleanly without backflowing into your home. Exploring top causes of clogged drains and how to fix them outlines common drain line obstructions and how to keep main branch lines flowing freely.
4. Pre-Installation Location Requirements
Before purchasing a water softener, inspect your home's layout to select an installation spot that satisfies critical plumbing, electrical, and drainage requirements.
Key Site Selection Criteria
- Main Supply Entry Point: The water softener must be installed upstream of your water heater and all interior branches to ensure soft water reaches every fixture. It must be located downstream of outdoor hose bibbs so you do not waste soft water watering lawns or washing cars.
- Level, Rigid Surface: The resin tank and brine tank filled with salt and water can weigh upwards of 300 to 500 pounds. Select a level concrete floor in a basement, insulated garage, or dedicated mechanical room.
- Proximity to an Approved Drain: During regeneration, the softener discharges 30 to 50 gallons of backwash brine. An approved drain—such as a floor drain, standpipe, or sump basin—must be located within 15 feet of the control valve.
- Dedicated Electrical Outlet: Digital control heads require a standard 120V grounded electrical outlet to power internal timer clocks and motorized valve actuators.
- Protection from Freezing: Water softeners must never be installed in unconditioned, open crawlspaces or unheated outdoor porches where winter temperatures drop below freezing.
Evaluating structural plumbing layout and pressure dynamics helps catch hidden mechanical vulnerabilities before installing major water treatment equipment. Exploring why you need a professional plumbing inspection details how certified technicians evaluate main line valves, pressure regulators, and equipment clearances.
5. Step-by-Step Water Softener Installation Process
While handy homeowners with pipe-fitting experience can perform DIY installations, partnering with a licensed professional plumber ensures strict compliance with local Knox County plumbing codes, backflow prevention regulations, and manufacturer warranties.
Step 1: Shut Off Main Water and Drain the Lines
Turn off your home's main water supply valve near the meter or where the line enters the house. Open the lowest faucet in your home and a high-level interior faucet to drain water from the plumbing system and relieve internal pressure.
Step 2: Install a Dedicated Sediment Pre-Filter
Before routing water into the softener control head, install a 20-micron sediment pre-filter housing on the incoming main line. Knoxville water distribution lines frequently contain microscopic silt, rust flakes, and pipe scale that can clog delicate internal valve ports and ruin softening resin if left unmanaged.
Step 3: Plumb the Bypass Valve Assembly
Install a three-valve bypass manifold or attach the manufacturer's quick-connect bypass valve directly to the water softener control head. A bypass valve allows you to isolate the water softener for routine maintenance or salt additions without shutting off water to the rest of your home.
Main Cold Water Line
       │
       ├───► [Bypass Valve Open] ───────────────► Home Supply Line
       │                                               ▲
       └───► [Inlet] ──► Water Softener ──► [Outlet] ──┘
Step 4: Make Pipe Connections
Route incoming cold water into the inlet port of the bypass valve and connect the outlet port to your interior home supply line using copper, PEX, or stainless steel flexible water connectors. Always keep hot water pipes at least 10 feet downstream from the softener outlet to prevent hot water thermal backfeeding into the resin tank.
Step 5: Install Drain Lines with an Air Gap
Connect a 1/2-inch flexible drain hose to the control valve drain port and route it to your floor drain or standpipe. Local plumbing codes mandate a physical air gap (at least 2 inches of open air space between the end of the drain hose and the flood level rim of the drain basin) to prevent raw sewage or backflow water from being siphoned into your drinking water supply.
Step 6: Connect the Brine Tank Overflow
Attach a secondary 1/2-inch overflow drain line to the elbow fitting located on the side of the brine tank. Route this line to a floor drain below the overflow level. Unlike the pressurized control valve drain, the brine tank overflow relies purely on gravity to prevent floor flooding in the event of a float valve failure.
Step 7: Startup and Programming
Slowly open the main water valve with the softener in bypass mode to flush plumbing dust out of the system. Then, switch the bypass valve to service mode, allowing water to fill the resin tank gradually. Plug in the electrical transformer, fill the brine tank with clean salt and 3 to 5 gallons of water, and program the digital control head with your water hardness level, current time, and desired regeneration schedule.
Establishing regular routine checkups keeps all mechanical systems operating smoothly. Learning how often should you inspect your plumbing provides clear guidance on routine maintenance intervals for water softeners, supply lines, pressure regulators, and water heating assemblies.
Enrolling in an annual maintenance program provides automatic plumbing checkups, salt level verification, priority dispatch, and peace of mind. Joining a dedicated plumbing service plan ensures your water softener, shutoff valves, water heater, and main lines are routinely evaluated by experienced local professionals.
6. Ongoing Maintenance and Salt Care
Maintaining a water softener requires minimal effort, but consistent upkeep is essential to ensure a long operational lifespan.
- Check Salt Levels Monthly: Inspect the brine tank once a month. Ensure the salt level remains at least half-full and sits several inches above the standing water level inside the tank.
- Prevent Salt Bridges: High humidity or using improper salt can create a hard, hollow crust of salt (a salt bridge) inside the brine tank. This prevents water from contacting the salt below, meaning the system regenerates with plain water instead of brine. Break up salt bridges using a broom handle.
- Choose High-Purity Salt: Always use high-purity evaporated salt pellets or solar salt crystals (99.6 percent pure). Avoid inexpensive rock salt, which contains insoluble minerals and clay that dirty the brine tank.
- Clean the Resin Bed Annually: Pour a bottle of specialized liquid resin cleaner into the brine well once a year. Resin cleaners strip iron, manganese, and organic silt off the resin beads that standard salt brine cannot remove.
Frequently Asked Questions
Is hard water dangerous to drink?
No. Hard water containing calcium and magnesium is completely safe to drink and poses no health risks. However, hard water is destructive to household plumbing, water heaters, glass fixtures, washing machines, and appliances, making water softening a functional home protection investment rather than a health requirement.
How much salt does a typical water softener use per month?
A properly sized water softener installed in a typical four-person Knoxville home uses approximately one 40-pound bag of water softener salt per month. High-demand households or homes with very hard water may require six to eight bags per year.
Can I use potassium chloride instead of sodium chloride in my softener?
Yes. Potassium chloride pellets can be used as a direct substitute for sodium chloride salt. Potassium chloride is ideal for homeowners on strict low-sodium diets or those concerned about releasing sodium brine into private septic systems, though potassium pellets generally cost more per bag than sodium salt.
Will a water softener soften my outdoor hose spigot water?
During installation, a plumber will route the softener inlet line downstream of your outdoor spigots. Hard water is fine for watering lawns, flowers, and gardens, so bypass plumbing ensures you do not waste softened water or salt on outdoor landscaping.
What is a salt bridge in a water softener brine tank?
A salt bridge is a hard, solidified crust that forms inside the brine tank, creating an empty air space between the salt and the water beneath. Because water cannot dissolve salt when a bridge is present, the softener cannot create brine, resulting in hard water throughout the house despite a full salt tank.
Does a water softener remove iron from Knoxville well water?
Standard water softeners can remove low levels of clear-water (dissolved ferrous) iron, typically up to 2 to 3 PPM. However, if your well water contains red-water (ferric) iron, iron bacteria, or high iron levels, you must install a dedicated iron oxidation pre-filter upstream of the softener to prevent resin fouling.
How long does a water softener resin bed last?
A high-quality water softener resin bed lasts between 10 and 15 years under normal operating conditions. Highly chlorinated municipal water can degrade resin beads over time, so installing a carbon pre-filter helps extend resin life significantly.
Can a water softener be installed outdoors in Knoxville?
No. Water softeners should not be installed outdoors in East Tennessee due to freezing winter temperatures, direct sunlight UV degradation, and rain exposure that can ruin electrical control heads. Softeners must be installed indoors, in an insulated garage, or inside a heated mechanical room.
How much water is used during a regeneration cycle?
A modern demand-initiated water softener uses between 35 and 65 gallons of water per regeneration cycle, depending on tank capacity. Because regeneration only occurs once every 6 to 7 days, modern softeners are highly water-efficient compared to older timer-based models.
What is the difference between a single-tank and a dual-tank water softener?
A single-tank system features one resin tank and must pause soft water delivery for 1 to 2 hours during night-time regeneration. A dual-tank system features two resin tanks side-by-side; when one tank exhausts its capacity, the controller instantly switches service to the second tank, delivering continuous soft water 24 hours a day without downtime.


